If your household is like mine, you have stacks of great kid art. The pictures may end up on the fridge for some time but they soon make way for new art. Give kid art new life by turning it into cute DIY books.
Make cute mini DIY books in under 10 minutes
This craft takes less than 10 minutes and can be made with items you likely have around the house. The books are useful as journals, note books, to-do lists, or sketch books and make great gifts. This craft is also a great introduction to the wonderful world of bookbinding, an art form that is widely under appreciated.
Use Paper you already have around the house
Although I planned this craft to be made with kid art it can obviously be made with a wide range of papers. Be creative and use any clean waste paper you have around the house.
How to make a DIY mini book
Materials & Tools
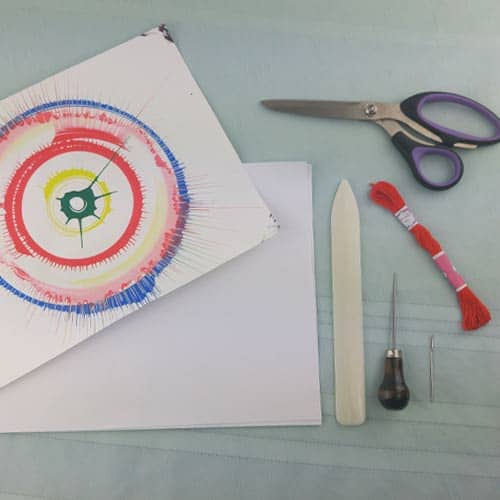
- heavy paper for covers (upcycled waste paper is best!)
- paper for the pages
- waxed thread or embroidery thread
- dull needle
- awl or push pin
- bone folder or old rewards/credit card
- scissors
Instructions
1. Cut cover page
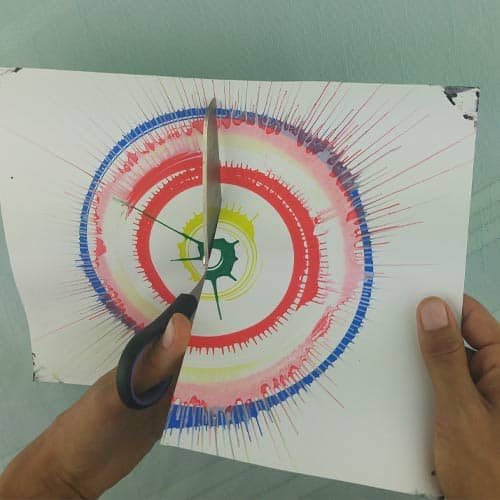
Cut a rectangle out of the cover paper and fold in half. Cut any size rectangle to make larger or smaller books. Run the card or bone folder along the fold to sharpen the crease.
2. Cut pages
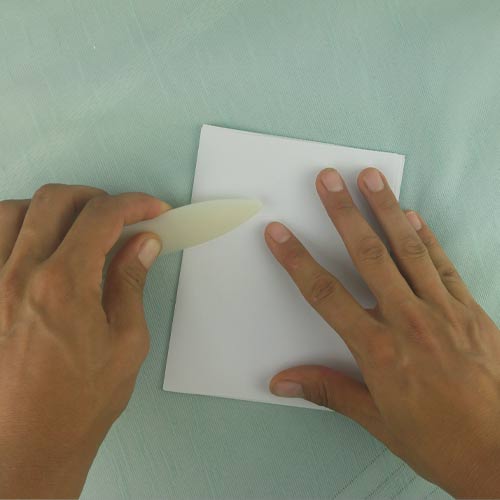
Use the cover page as a template to cut 5 to 10 rectangles from the paper for pages. Stack the pages and fold in half. Use the card or bone folder to sharpen the crease.
3. Punch holes
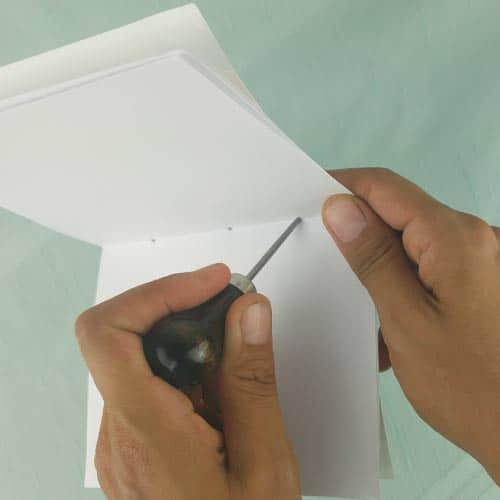
Place the pages inside the cover paper and use the push pin or awl to punch three holes along the crease, one in the centre and two on either side. Make sure the holes are large enough for the needle to easily pass through them. You can twist the push pin around inside the hole to make it bigger if needed.
4. Sew
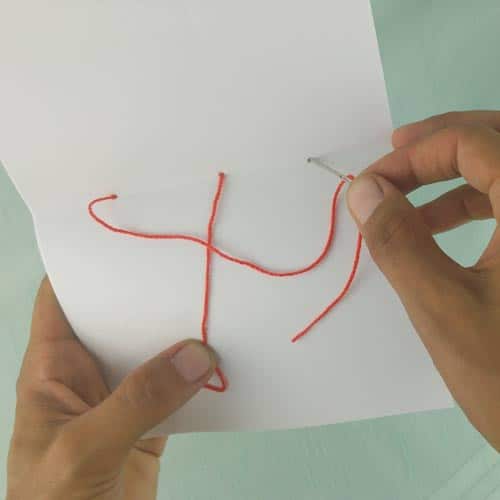
Thread about 30 cm of embroidery thread into the needle. Thread the needle through the middle hole starting on the inside of bookmaking sure the tail of the thread does not get pulled through the book.
Thread the needle in the top hole from the outside then run along the crease and through the bottom hole.
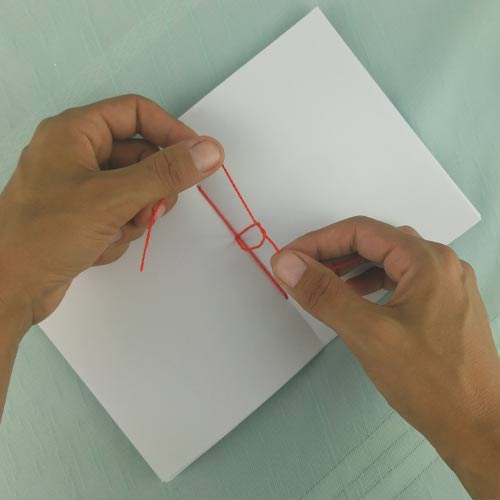
Finally thread the needle through the middle hole again, this time from the outside. Remove the needle from the thread and tie the two end in a double knot close to the crease. Trim the end close to the knot leaving a small bit of thread so the knot does not come undone.
5. Trim

Use scissors to trim edges of book if needed.
How to set this craft up for little kids
After many events where I have made mini books with groups of kids, I have noticed a wide range of interest in the bookmaking process but a nearly universal interest in using the finished books. Although making a book from start to finish takes under 10 minutes, it is a good idea to consider your child’s attention span and interests and prepare ahead of time to shorten the craft if you think it is best.
Little kids, in particular, can lose patience on a craft like this one that has fixed steps and requires adult guidance. If you know your child is unlikely to enjoy the whole process you can prepare the book cover and pages ahead of time and punch the holes leaving only the sewing to do together. This allows the child to be involved in the making of the book but quickly gets to the open-ended creative work of drawing in the book.